
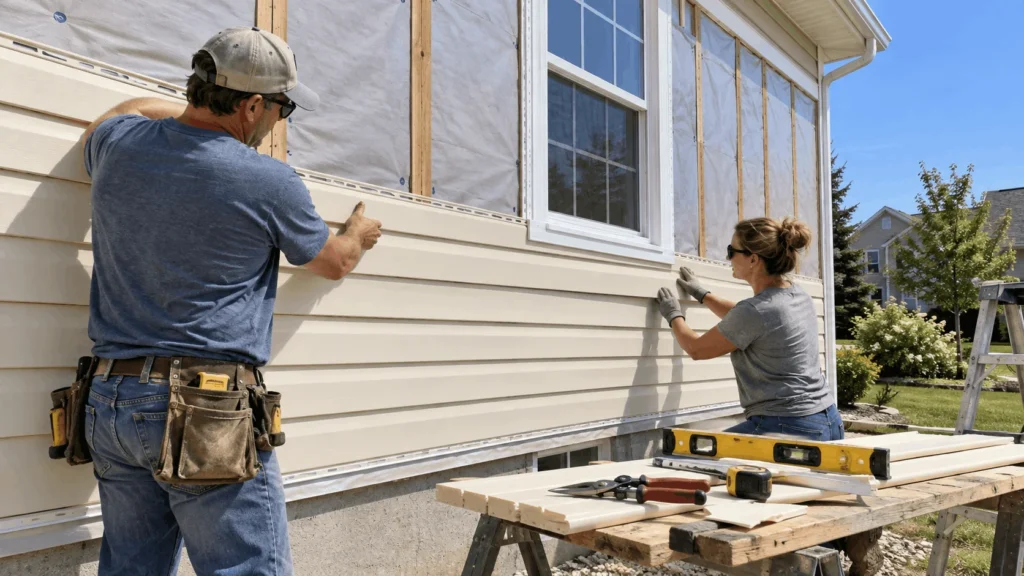
If you want to know how to hang vinyl siding, the whole job comes down to one idea: vinyl is a floating skin. It expands and contracts with the temperature, so it has to hang from nails that are never driven tight, in slots that let the panel slide. Get that right, add a level starter strip and properly flashed trim, and the wall looks flat for decades. Get it wrong and you get the wavy, buckled siding everyone has seen on a sunny afternoon.
This guide walks through the job in the order a crew would do it: prepping the wall, snapping the starter line, hanging the first course, nailing, working around windows and doors, and finishing under the soffit. It is written for homeowners who want to hang a wall themselves and for anyone hiring a crew who wants to know what good work looks like, with the Canmore and Bow Valley details that matter here: big temperature swings, chinook winds and a wildfire-conscious community.
✓Key takeaways
- Vinyl siding is a hanging system, not a glued-on skin. Panels must be free to move sideways as they expand and contract.
- Prep first: flat sheathing, a lapped weather-resistive barrier, flashed openings and the trim (J-channel, corner posts, starter strip) up before any panel.
- Nail in the centre of the slot, leave about 1/32 in. between the nail head and the panel, and never drive nails tight.
- Leave an expansion gap at every trim pocket, and lap panel ends about 1 in., with laps staggered and turned away from the main view.
- Work bottom to top. Lock each panel to the one below, and finish the top course with a zip tool.
- In Canmore, vinyl is affordable and low-maintenance, but FireSmart Canada notes it can melt in a wildfire, so think about your wildfire exposure before choosing it.
In this guide
What vinyl siding is and why installation is different
Vinyl siding is extruded PVC (polyvinyl chloride) formed into long interlocking panels. It comes in horizontal lap profiles such as clapboard and Dutch lap, in vertical profiles like board and batten, and in shake and shingle looks. It is the most common cladding in Canada because it is light, quick to install and needs no painting. Panels are typically sold by the square, meaning 100 sq ft of coverage.
What makes vinyl different from wood or fibre cement is that it moves. PVC expands when it heats and shrinks when it cools, and a 12 ft panel can change length by a noticeable fraction of an inch between a January cold snap and a July afternoon. Every installation rule you will read, from loose nails to trim pockets, exists to let that movement happen without the panel buckling.
Why the temperature swing matters so much here
▲Bow Valley note
In Canmore and the Bow Valley, a wall can go from a chinook-warmed afternoon to a hard overnight freeze in a matter of hours. That is exactly the kind of cycle that punishes tight nailing and missing expansion gaps. It is also why we hang vinyl slightly looser than most people expect, and why we check the fastener rules for the specific product instead of guessing.
The trade-off to be honest about
Vinyl is the budget-friendly choice and it needs almost no upkeep. It is also the softest material on the wall: it can crack in deep cold, dent from hail and, as FireSmart Canada points out, melt in the heat of a wildfire. If you are comparing materials before you commit, read our guide to siding installation cost by material and our walkthrough for installing Hardie board, which is the non-combustible alternative many mountain homes choose.
Before you start: tools, materials and wall prep
Nine out of ten vinyl problems we get asked to look at started before the first panel: an uneven wall, a starter strip that was not level or trim that was nailed too tight. Take a day to prep and the hanging itself goes quickly.
Tools and materials checklist
| Item | What it is for | Notes |
|---|---|---|
| Snap lock punch (siding lock punch) | Making raised tabs on cut panel edges so they hold | Needed wherever you cut off the factory nailing hem, such as under windows and at the top course. |
| Zip tool (unlocking tool) | Unlocking panels to fix a mistake and locking the last course | A cheap tool that saves a lot of swearing. |
| Tin snips, aviation snips or a fine-tooth blade | Cutting panels and trim | Cut vinyl with the blade reversed in a circular saw, and go slowly when it is cold. |
| Hammer or siding nailer, plus corrosion-resistant siding nails | Fastening into studs | Roofing-style nails with a wide, flat head. Length must reach at least 1-1/4 in. into solid wood. |
| Level, chalk line, tape, utility knife, square | Layout and straight courses | Snap a line for the starter strip and check it often. |
| Starter strip, corner posts, J-channel, utility trim, undersill trim | Trim pieces that hold the panel edges | Everything that receives a panel end needs a pocket. |
| Weather-resistive barrier, flashing tape, Z-flashing | Water management behind the siding | Vinyl is not waterproof by itself. The layer behind it is what keeps the house dry. |
| Safety glasses, gloves, ladder or scaffold | Personal safety | Cut vinyl chips fly and the edges are sharp. |
We list everything, including the extras we find useful, in our vinyl siding installation tools checklist, so you can shop or rent in one go.
Check and prepare the wall
- Sheathing: flat, dry and solid. Replace any soft, delaminated or stained boards. Vinyl will telegraph every bump.
- Framing: find your studs and mark them, because nails need to reach solid wood.
- Weather-resistive barrier: lapped from the bottom up, with tape at every seam and around every opening.
- Windows and doors: flashed sill first, then jambs, then head. If you are replacing windows, do it before the siding. Our window renovation work is often scheduled ahead of a re-side for exactly this reason.
- Old siding: removing it is usually better than going over it, because you can see and fix what is behind it.
- Trim locations: plan where corner posts, J-channel and the starter strip go so every panel end has a pocket.
What sits behind a vinyl siding wall
Vinyl is a rain screen, not a seal. The water management behind it does the real work.
- Interior finishDrywall and paint on the room side.
- Framing and insulationStuds at 16 or 24 in. on centre. Nails must reach them.
- SheathingOSB or plywood, flat, dry and sound.
- Weather barrierLapped, taped and flashed at every opening.
- Vinyl sidingHung loosely from nails in slots, free to move.
Simplified wall assembly for illustration. Follow your building plans and the Alberta Building Code for your project.
How to hang vinyl siding, step by step
The install in eight steps
Work bottom to top and keep every panel free to slide.
- Prep and flashBarrier, tape and flashing at every opening.
- Trim firstCorner posts, J-channel, starter strip.
- Starter stripLevel line, nailed straight.
- First panelLock it in, nail loosely.
- Nail rulesCentre of slot, never tight.
- OverlapsAbout 1 in., staggered.
- Windows and doorsJ-channel, cut and lock.
- Last courseUndersill, zip tool, finish.
Step 1: Prep the wall and flash every opening
Wrap the wall from the bottom up so each layer laps over the one below, tape the seams and flash the openings. It is boring work and nobody will ever admire it, but it is the layer that protects the framing when wind-driven rain gets behind the vinyl. Do not skip it, and do not staple it and forget it.
Step 2: Install corner posts and trim before any panel
Corner posts go up first, hung from the top nail slot so they can drop slightly and move with temperature. Then add J-channel around windows and doors, and run utility trim or undersill trim under the soffit. Every panel end needs to slide into a pocket, so the trim is built first and the panels are fitted to it.
Step 3: Snap a level line and fasten the starter strip
Measure up from the lowest point of the wall to leave room for the first panel, and snap a level line all the way around. The starter strip is nailed along that line, and its height controls the look of every course above it. Do not trust the foundation to be level: snap from a level reference, not the bottom of the wall.
!Crew tip
We would rather spend twenty minutes on the layout than pull down four courses later. A wall that is a quarter inch out over 30 ft shows up as tapering courses by the time you reach the top.
Step 4: Hang and lock the first panel
Hook the bottom of the first panel into the starter strip and snap it up so it locks. Check that it is level before the first nail goes in. Everything above it follows this panel, so a slightly bent first course becomes a wavy wall.
Step 5: Follow the nailing rules
This is the step that ruins most first-time jobs. The rules are simple, but they are the opposite of how you would normally drive a nail.
- Nail in the centre of the slot, so the panel has room to slide either way.
- Do not drive the nail tight. Leave about 1/32 in. (roughly the thickness of a dime) between the head and the panel, so the panel can float.
- Drive nails straight so the head sits flat and does not distort the hem.
- Never face nail through the middle of a panel. Where you have cut off the nailing hem, such as under a window, use the snap lock punch to make raised tabs, so the panel locks in without a nail through its face.
- Nail from the middle of the panel outward, so the panel finds its own position instead of getting pinned at one end.
×Watch out
Nailing too tight is the number one cause of buckling. If you cannot slide the panel a few millimetres by hand after it is nailed, the nails are too tight and the wall will wave in summer heat.
Step 6: Overlap panels and leave expansion gaps
Where two panels meet end to end, the lap is usually about 1 in., and the manufacturer’s instructions specify the exact figure. Stagger the laps so no two neighbouring courses break in the same place, and turn the laps away from the direction people usually approach the house from so they are less visible. At every trim pocket, leave a small gap, roughly 1/4 in. in mild weather and more if you are hanging in the cold, so the panel has room to grow.
| Location | What to leave | Why |
|---|---|---|
| Panel end into J-channel or corner post | Small gap, about 1/4 in. in mild weather, more when cold | Lets the panel expand without pressing on the trim |
| Overlap between two panels | About 1 in., staggered | Covers the joint and lets each panel move |
| Nail head to panel | About 1/32 in. | Panel slides instead of buckling |
| Panel end to window or door trim | Same gap as any other pocket | Windows heat and cool differently from the wall |
These are typical values for illustration, so always check the gaps printed in the installation instructions for the exact product you have. Vinyl Siding Institute installation standards and the manufacturer’s guide take priority over anything on a website, including ours.
Step 7: Windows, doors and other openings
Cut panels to fit around openings, leaving a gap at the J-channel on each side. Use a snap lock punch to make raised tabs on the cut edge where the nailing hem was removed, so the panel still locks into the course above. Below a window sill, use a piece of trim and a cut panel that locks into the panel above. Around outlets, hose bibs and vents, use mounting blocks and light fixture trim so water has a clean place to run off.
Step 8: The last course under the soffit
The top course is cut to fit and locked into undersill trim or J-channel under the soffit. You cannot nail it in the usual way, so use the zip tool to pull the bottom lock down, slide the cut panel in and push it up to lock. It looks fiddly the first time but goes quickly once you have done one.
▲Bow Valley note
If the house is in a chinook-prone area, check that each panel is fully locked and that the top course is properly seated, since wind can lift a loose panel off a wall and flap it until it cracks. Our crew walks each wall after finishing and gives every course a firm tug for exactly that reason.
Common mistakes to avoid
- Nailing too tight. The most common cause of waves and buckles.
- No expansion gaps at trim pockets. Panels pressed against J-channel push out in summer.
- Face nailing panels. It pins the panel in place and shows a nail head.
- Starting from an unlevel line. Every course inherits the error.
- Skipping the barrier. Vinyl is not watertight, and the water has to go somewhere.
- Cutting when it is very cold. Vinyl gets brittle, so cut slowly, support the panel and use a fine-tooth blade.
- Stretching panels. Do not pull a panel tight to get it to lock, because it will pull back in the heat.
- Using undersized nails. They pull out in wind.
DIY or hire a vinyl siding installer?
Vinyl is the most DIY-friendly siding in the shop. Panels are light, cuts are simple and the tools are inexpensive. It is still an all-day, up-a-ladder job with a lot of small decisions, and a small mistake such as tight nailing does not show for a year. For a shed, a gable end or a small addition, most handy homeowners can do it. For a whole two-storey house, a good crew can be up and finished in a fraction of the time.
DIY pros
- Save labour costs on a small job or an addition
- Light material that is easy to cut and carry
- Low tool cost, and you can rent the specialty tools
DIY cons
- Working at height on ladders or scaffolds
- Mistakes such as tight nails appear months later
- Flashing errors hide behind the panels
- Poor detailing can affect warranty coverage
If you decide to hire, read how to choose a vinyl siding installation company first, and see our own siding installation service for how we approach it. For a price breakdown before you call anyone, use our vinyl siding installation cost guide.
How long does it take?
A small wall or a gable end is an afternoon for two people. A typical single-storey house takes a crew a few days, and a two-storey home with lots of windows and trim can run a week or more. Weather is the usual delay. Vinyl is more brittle in the cold, so we plan the schedule around the coldest mornings in the shoulder seasons up here.
The official installation instructions
What you have read is a summary. The manufacturer’s installation instructions and the Vinyl Siding Institute standards are the authority, and both are updated from time to time. Download the current guide for your exact product and keep it on site. If your installer cannot tell you which version they follow, that is worth a conversation.
Frequently asked questions
How do you hang vinyl siding on a house?
Flash and wrap the wall, install corner posts and J-channel, nail a level starter strip, then hang panels from the bottom up. Nail in the centre of each slot without driving nails tight, lap panel ends about 1 in., leave expansion gaps at trim and finish the top course with undersill trim and a zip tool.
Do you start at the top or bottom when hanging vinyl siding?
At the bottom. Each panel locks into the one below, and the starter strip sets the line for the whole wall.
How far should nails be from the vinyl siding panel?
Leave about 1/32 in. between the nail head and the panel so it can slide as it expands and contracts. Nails should never be driven tight.
How far apart should you nail vinyl siding?
Follow the manufacturer’s spacing, which is generally no more than 16 in. apart along a panel, with nails centred in the slots and reaching at least 1-1/4 in. into solid wood.
Why is my vinyl siding buckling or wavy?
The usual cause is nails driven too tight or panels with no room at the trim pockets. Loosen the nails, check the gaps and use a zip tool to release and reset the panel.
Can vinyl siding be installed in cold weather?
Yes, but cut slowly, handle panels carefully and leave larger expansion gaps, because vinyl is more brittle when cold and expands more as it warms.
Is vinyl siding a good choice near wildfire zones like Canmore?
It is affordable and low maintenance, but FireSmart Canada notes vinyl can melt and expose the wall behind it. In the wildland-urban interface, consider a non-combustible cladding such as fibre cement.
Want your siding done right the first time?
Old Goat Construction installs siding across Canmore and the Bow Valley. Tell us about your wall and we will give you a straight answer on materials, timing and cost.
