
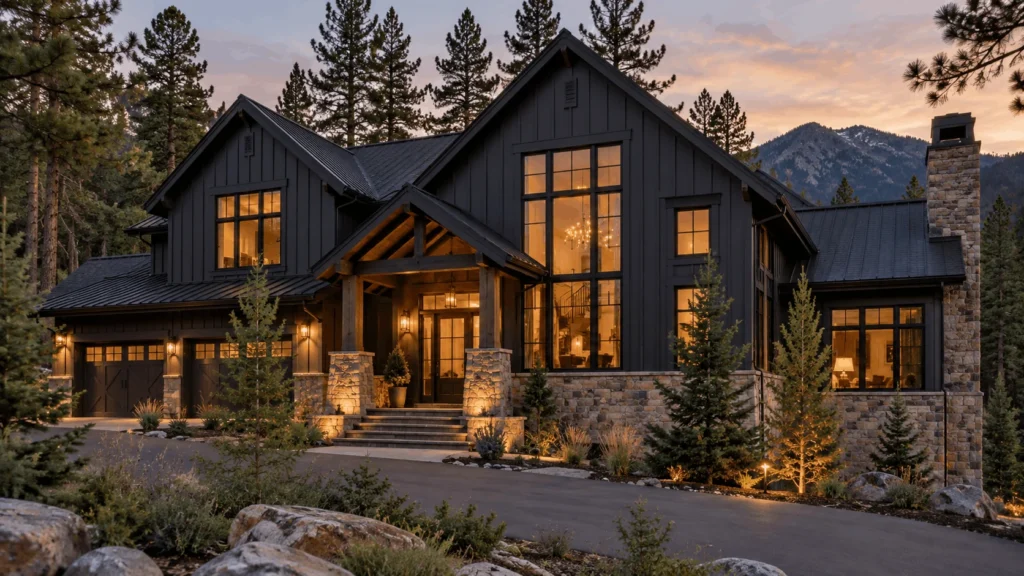
Board and batten siding is the vertical look you see on modern farmhouses, mountain lodges and barns: wide boards or panels running up and down, with narrow battens covering the seams. It looks simple, and the design itself is old, but installing it well takes more planning than a horizontal wall. Vertical boards have nothing to nail into between the studs, water runs down them instead of across them, and every seam is a chance for a leak if the flashing is wrong.
This guide covers installing board and batten siding in the three materials people actually use, which are wood (usually cedar or pine), fibre cement (such as HardiePanel with HardieTrim battens) and vinyl. You will find the layout math, the furring and flashing details, the nailing rules, a comparison table and the mistakes we see most often on mountain homes.
✓Key takeaways
- Board and batten means wide vertical boards or panels with narrow battens over the joints. The battens hide the seams and shed water.
- Layout first. Decide the batten spacing (commonly about 12 to 16 in. on centre) so the pattern lands evenly at corners and windows.
- Vertical boards need horizontal nailers. Wood systems usually add horizontal furring, often 1×4 boards at about 24 in. spacing.
- Flash every horizontal joint. Fibre cement panels need Z-flashing with a 1/4 in. gap at horizontal joints, and the gap is not caulked.
- Fasten correctly: fibre cement fasteners sit about 3/8 in. from panel edges and at least 2 in. from corners. Vinyl must be nailed loosely so it can move.
- Paint fibre cement within 180 days. Wood needs a sealed finish on every face, including the ends.
In this guide
What is board and batten siding?
Board and batten (also called board-and-batten, board & batten or batten siding) is a vertical siding system. Wide boards or panels run vertically, and narrow strips called battens cover the joints between them. The style dates back to early wooden-frame buildings in North America, where vertical boards helped rain run off and the battens covered the gaps where wood moved. There is also reverse board and batten, where the narrow strips go underneath and the wide boards go on top, which gives a stronger shadow line.
Today the look comes in several materials. Wood is the traditional choice, fibre cement is popular for durability and fire resistance, and vinyl gets the appearance at the lowest cost. The layout and the water-management principles are the same for all three, but the fasteners, gaps and finishing steps are not.
Why board and batten suits Canmore and the Bow Valley
▲Bow Valley note
The clean vertical lines suit a mountain setting, echoing tall trees and steep rooflines, and it is common on modern chalets, guest suites and garage builds here. It also works well as an accent above a stone base or on a gable end. Chinook winds, strong sun, snow load and wildfire risk all shape what we recommend, which is why we often steer homeowners toward fibre cement or properly finished cedar rather than the cheapest option.
Board and batten vs lap siding
Lap siding runs horizontally, shedding water across overlapping boards. Board and batten runs vertically, so water runs down the seams and behind the battens, which is why flashing, sealing and drainage details matter more. In exchange you get a taller, cleaner look that makes a house feel higher and works especially well on gables and two-storey walls.
Board and batten materials compared
| Detail | Wood (cedar, pine) | Fibre cement (HardiePanel and battens) | Vinyl |
|---|---|---|---|
| Look | Natural grain, authentic feel | Painted, crisp lines, wood-like | Uniform, moulded profile |
| Typical installed cost per sq ft (Calgary and Canadian guides) | Cedar $12 to $20 | Fibre cement $8.40 to $15 (HomeStars); Hardie $10 to $16 (Calgary) | Vinyl $4.80 to $11.50 |
| Maintenance | Stain or paint on a schedule | Repaint occasionally | Very little |
| Fire performance | Combustible, treat with care | Superior fire resistance (FireSmart Canada) | Can melt (FireSmart Canada) |
| Installation difficulty | Moderate, needs sealing and furring | Higher, heavy and needs dust control | Easiest, floating panels |
| Best for | Custom, natural look | Mountain homes wanting low maintenance and fire resistance | Budget projects and accents |
For a deeper dive into the material specifics, see our guides to installing cedar siding, installing Hardie board and hanging vinyl siding.
Before you start: tools, materials and layout
Tools and materials checklist
| Item | What it is for | Notes |
|---|---|---|
| Level, chalk line, tape and story pole | Plumb lines and even spacing | Vertical lines show every mistake. Check plumb often. |
| Circular saw or table saw with the right blade | Ripping and cutting boards and battens | Use a fibre cement blade with dust collection for fibre cement, a fine-tooth blade for wood and vinyl. |
| Nailer or hammer, plus corrosion-resistant fasteners | Fastening boards and battens | Stainless or hot-dipped galvanized for cedar, to avoid black stains. |
| Furring strips (1×3 or 1×4) and blocking | Nailing surface between studs | Needed for vertical boards on most walls. |
| Weather-resistive barrier, flashing tape and Z-flashing | Water management behind the siding | The layer that protects the framing. |
| Caulk, primer, paint or stain | Sealing and finishing | Match the product to the material. |
| Respirator, eye and ear protection, gloves | Personal safety | Especially important when cutting fibre cement. |
Plan the layout before the first board goes up
This is the step most people skip and then regret. Walk the wall and mark the corners, window edges and door edges. Decide the spacing between battens, which is a design choice and not a code number, and commonly falls around 12 to 16 in. on centre. Then adjust the spacing slightly so that battens land symmetrically on a gable, on either side of a window, and at the corners without leaving a thin sliver of board.
!Crew tip
Draw the wall on paper with the batten lines and windows marked. Ten minutes of layout will show you whether you end up with a half-width board beside a window, which is the kind of thing that is easy to fix on paper and expensive to fix on the wall.
Furring and drainage
Wide vertical boards need something to nail into between the studs. On wood systems this is usually horizontal furring, for example 1×4 strips at roughly 24 in. spacing, fastened to the studs. Horizontal strips can trap water running down the wall, so many crews add small drainage gaps, use a vented rain-screen detail or a drainage mat behind the furring. Ask your contractor how they handle it, because it is one of the details that separates a wall that lasts from one that rots behind the paint.
What sits behind a board and batten wall
Vertical siding needs a solid nailing surface and a way for water to drain.
- Interior finishDrywall and paint on the room side.
- Framing and insulationStuds at 16 or 24 in. on centre.
- SheathingOSB or plywood, flat, dry and sound.
- Weather barrierLapped, taped and flashed.
- Furring or nailersHorizontal strips to fasten vertical boards.
- Boards and battensVertical boards with battens over the joints.
Simplified wall assembly for illustration. Follow your building plans, the manufacturer’s instructions and the Alberta Building Code for your project.
How to install board and batten siding, step by step
The install in eight steps
The order is the same for wood, fibre cement and vinyl.
- Prep and wrapBarrier, tape and window flashing.
- LayoutMark corners, openings and batten lines.
- FurringAdd horizontal nailers where needed.
- First boardSet it plumb and true.
- FastenCorrect nails, correct spots.
- Flash jointsZ-flashing at horizontal seams.
- BattensCover the seams, plumb and even.
- FinishCaulk, seal, prime and paint.
Step 1: Prep the wall, wrap and flash the openings
Wrap the wall from the bottom up so every layer laps over the layer below, tape the seams and flash the windows and doors. Add a starter or drip edge at the bottom so water leaves the wall and does not wick into the boards. This is the layer that keeps the framing dry when wind-driven rain gets behind the siding.
Step 2: Mark the layout lines
Snap plumb lines for the first board and the batten locations. Use a level or a plumb bob, not the corner of the house, because corners lean. Confirm the spacing against the window and door edges before you fasten anything.
Step 3: Install furring and nailers
Fasten the furring to the studs, keeping the strips level and flat. On a wall where the sheathing is wavy, shim the furring so the boards land in one plane. A crooked nailing surface shows up as ripples in the finished boards.
Step 4: Hang the first board
Start at a corner or at a marked layout line. Set the first board plumb, check it with the level from the top and bottom and fasten it. Every board after it follows this one, and a vertical wall shows any lean far more than a horizontal wall does. Leave a gap of about 1/4 in. above grade and at the soffit for wood movement and drainage.
Step 5: Fasten correctly for your material
- Fibre cement: use corrosion-resistant fasteners, keep them about 3/8 in. from edges and no closer than 2 in. from corners, and fasten into studs.
- Wood: use stainless or hot-dipped galvanized nails or screws. Ordinary steel fasteners cause black streaks on cedar.
- Vinyl: nail in the centre of the slot, leave about 1/32 in. under the head and never drive tight, as covered in our vinyl siding guide.
- Do not over-drive fasteners. Snug is right, crushed is wrong.
Step 6: Flash the horizontal joints
If your boards or panels stack in more than one piece, every horizontal joint needs a Z-flashing. For HardiePanel, the instructions call for Z-flashing at horizontal joints with a 1/4 in. gap between the panels, and they say not to caulk it. On tall gables, plan the joint so it lands in a spot where it is covered, such as at a belly band.
Step 7: Install the battens
Battens go over the joints between boards and are fastened through the seam into the framing or furring, or into the board itself, depending on the system. Keep them plumb, keep the spacing consistent and check the exposed edge of every batten as you go. Battens are the finish carpentry of the wall, and they show every wobble.
×Watch out
Fibre cement cutting releases silica dust. Cut outdoors with dust collection or shears, wear a respirator, and never dry sweep. The manufacturer’s instructions say not to cut or grind with a power saw indoors.
Step 8: Seal, prime and paint
For fibre cement, James Hardie’s instructions say products must be painted within 180 days, and 100% acrylic topcoats are recommended. For wood, seal or prime all faces and cut ends before installation if you can, since end grain absorbs the most water. Caulk only where the manufacturer allows it, and leave the horizontal Z-flashing gaps open.
▲Bow Valley note
Plan finishing around the weather. Sealants and paints have minimum application temperatures printed on the label, so try to schedule the finishing days in a dry, above-minimum window instead of on a cold shoulder-season morning.
Trim details: corners, windows and gables
Corners on board and batten are usually finished with an outside corner board or two overlapping corner battens. Windows and doors get trim boards, with a small gap sealed with flexible exterior caulk and flashing above. At a gable, cut the boards to the roof pitch, and keep the batten spacing consistent, because the eye picks out irregular spacing quickly on a triangle. If the wall has a horizontal transition, a belly band or a Z-flashing at the change is the cleanest way to break the boards.
Mistakes to avoid
- Skipping the layout. Uneven batten spacing and slivers at corners are obvious from the street.
- No flashing at horizontal joints. Water gets behind the boards and into the wall.
- Caulking a flashing gap that is meant to drain. Follow the manufacturer’s instructions.
- Using the wrong fasteners on cedar. Black streaks and rust stains are almost impossible to remove.
- Nailing too tight on vinyl. Panels buckle in summer heat.
- Not sealing cut ends of wood. End grain soaks up water and rots first.
- Hanging the first board off a leaning corner. Everything else follows it.
- Going too cheap on the furring. A wavy nailing surface makes a wavy wall.
DIY or hire a board and batten installer?
Board and batten looks like a good weekend project, and a small wall or a shed really is. A full house is a different story, because the layout, flashing and drainage details decide how the wall performs in ten years. Fibre cement adds weight and dust control, and wood adds finishing time. If you are unsure about layout or flashing, hiring a crew for the wrap, flashing and hanging, and doing the painting yourself, is a sensible split.
DIY pros
- Saves labour cost on a small wall or accent gable
- Straightforward carpentry for anyone comfortable with level and plumb work
- You choose the exact batten spacing and pattern
DIY cons
- Vertical lines show every mistake
- Flashing and drainage errors cause hidden rot
- Fibre cement needs dust control and heavy lifting
- Working at height on gables and two-storey walls
For price comparisons across materials, read siding installation cost by material, and see our siding installation service if you would like us to look at your wall.
Frequently asked questions
How do you install board and batten siding?
Wrap and flash the wall, plan the layout, add horizontal furring where needed, hang the boards or panels plumb, fasten them correctly for the material, flash any horizontal joints, cover the seams with battens, then caulk, seal and paint or stain.
How far apart should battens be on board and batten siding?
It is a design choice, and 12 to 16 in. on centre is common. Adjust the spacing slightly so the pattern is symmetrical around windows, doors, corners and gables.
Do you need furring strips for board and batten siding?
Usually, yes. Vertical boards have nothing to nail into between studs, so installers add horizontal furring or blocking, often 1×4 strips at about 24 in. spacing, and manage drainage behind them.
Can you install board and batten siding over existing siding?
It is possible in some cases, but we prefer removing the old siding so you can check and repair the wall behind it. Extra layers can also make flashing and window details difficult.
What nails should I use for cedar board and batten?
Stainless steel or hot-dipped galvanized fasteners. Ordinary steel nails react with the wood and leave black streaks.
Is board and batten siding more expensive than lap siding?
The material cost per square foot is usually similar for the same material, but labour can be higher because of the layout, furring and detail work. Published Canadian ranges are roughly $4.80 to $11.50 for vinyl, $8.40 to $15 for fibre cement and $12 to $20 for cedar per sq ft installed.
Is board and batten a good choice for wildfire areas like Canmore?
Fibre cement board and batten is a strong option, since FireSmart Canada lists fibre cement among cladding with superior fire resistance. Wood and vinyl are more vulnerable, so detailing and vents matter.
Planning a board and batten wall?
Old Goat Construction installs siding across Canmore and the Bow Valley. Tell us about your project and we will give you an honest recommendation on material, layout and cost.
