
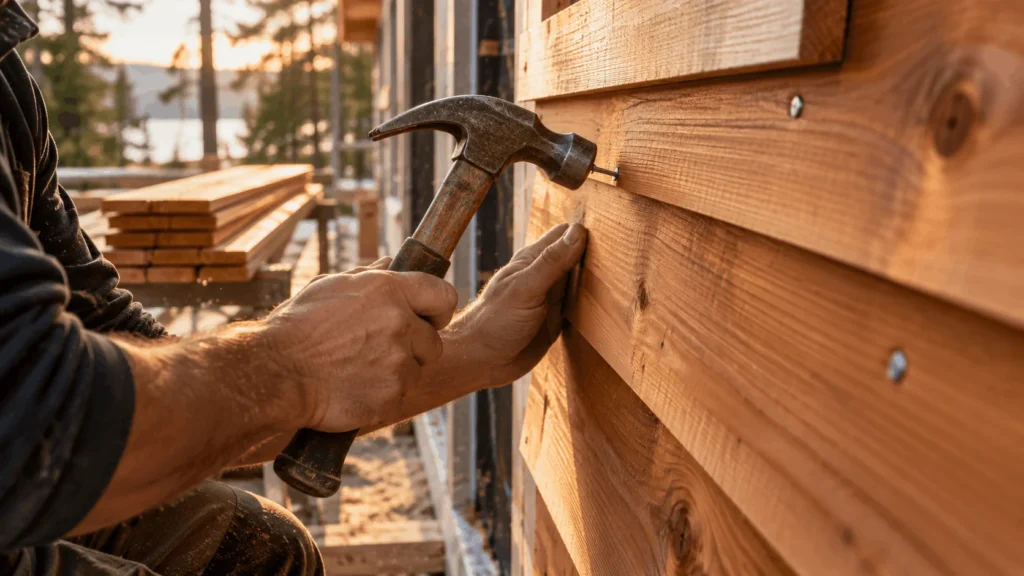
Installing cedar siding is as much about what you do before and after the boards go up as about the hanging itself. Western red cedar is a beautiful, stable, naturally rot-resistant wood, and it is the look many Bow Valley homeowners want. It is also a living material that takes on water at end grain, reacts with the wrong nails and weathers quickly in high-altitude sun if the finish is neglected. Get the fasteners, clearances and finishing right, and a cedar wall can look better with age. Get them wrong and you get black streaks, cupped boards and rot at the bottom course.
This guide covers what we would tell a friend who was about to hang cedar: the profiles, the tools, the fasteners, the clearances the cedar industry recommends, how to seal and finish, the mistakes we see and the mountain-specific issues of sun, snow, chinook winds and wildfire.
✓Key takeaways
- Use the right nails: stainless steel is the best choice (No. 304 for general use), and hot-dipped galvanized or aluminum are also accepted. Ordinary steel and copper nails react with cedar and stain it.
- Penetrate at least 1-1/4 in. into solid wood, with splitless siding nails, and keep spacing within the manufacturer’s limits.
- Keep water out of the bottom: at least 6 in. above grade, at least 2 in. between siding and roofs or decks, and siding about 1/4 in. above flashing.
- Seal every face and every cut end, especially end grain at the bottom of vertical boards.
- Caulk with the right sealant: acrylic, polyurethane and similar products, not pure silicone or clear caulks, which do not work well on cedar.
- Cedar is combustible. In the Bow Valley, plan for ember-resistant details and consider where cedar is best used, such as accent walls.
In this guide
- What is cedar siding, and why choose it?
- Before you start: tools, materials and site prep
- How to install cedar siding, step by step
- Cedar siding installation cost
- Cedar and wildfire: what to think about in Canmore
- Common cedar siding mistakes
- DIY or hire a cedar siding installer?
- Frequently asked questions
What is cedar siding, and why choose it?
Cedar siding is cut from Western red cedar (with some yellow cedar and Eastern white cedar in other markets), a softwood valued for its natural oils, straight grain and dimensional stability. Those oils give it resistance to decay and insects, and it holds finishes better than most softwoods. It comes in several profiles, and each one has its own installation logic.
| Profile | Look | Installation notes |
|---|---|---|
| Bevel (lap) siding | Classic overlapping clapboard | Nailed through the lap, with correct overlap so water sheds |
| Channel rustic or shiplap | Grooved, flatter face | Boards interlock, so allow for movement |
| Tongue and groove | Smooth, tight seams, horizontal or vertical | Blind nailed, needs careful moisture control |
| Board and batten | Vertical boards with battens over joints | Needs horizontal furring, see our board and batten guide |
| Shingles and shakes | Textured, rustic | Staggered joints, nailed per course |
If you are drawn to the vertical look, our guide to installing board and batten siding covers the layout and furring in detail.
Why cedar suits the Bow Valley look
▲Bow Valley note
Cedar looks right against mountain scenery: it echoes timber-frame lodges and the surrounding forest, and it takes stain well in a wide range of tones. It also has real challenges here: strong high-altitude UV, big freeze-thaw cycles, drifting snow at the base of walls and wildfire risk. The good news is that most of those challenges are manageable with detail work, which is what the rest of this guide is about.
Cedar vs other siding at a glance
| Feature | Cedar | Fibre cement | Vinyl |
|---|---|---|---|
| Look | Natural grain, warm colour | Painted, wood-like | Uniform, moulded |
| Maintenance | Stain or paint on a schedule | Repaint occasionally | Very little |
| Fire performance | Combustible | Superior fire resistance (FireSmart Canada) | Can melt (FireSmart Canada) |
| Installed cost per sq ft (Calgary guide) | $12 to $20 | $10 to $16 | $5.50 to $9.00 |
| Best for | Warm, natural, mountain look | Low-maintenance, fire-conscious builds | Lowest upfront cost |
Before you start: tools, materials and site prep
Tools and materials
| Item | What it is for | Notes |
|---|---|---|
| Miter saw with a sharp fine-tooth blade | Clean, square cuts | Cedar splinters easily, so a sharp blade matters. |
| Level, chalk line, story pole, tape | Straight, evenly spaced courses | A story pole lets you plan the last course. |
| Siding nailer or hammer, plus splitless siding nails | Fastening into studs | Stainless steel is the best option. |
| Finish or brad nailer | Trim and corner boards | Use stainless or hot-dipped galvanized. |
| Weather-resistive barrier, flashing tape, Z-flashing, starter strip | Water management | Cedar needs a dry wall behind it. |
| Sealer, stain or primer, and brushes | Sealing ends and finishing | Do this before hanging, if you can. |
| Caulk gun and cedar-friendly sealant | Sealing joints | Avoid pure silicone. |
| Safety glasses, dust mask, gloves, ladder or scaffold | Personal protection | Cedar dust irritates skin and lungs. |
Our siding installation tools checklist covers ladder safety and what to buy or rent.
Buy, store and acclimate the boards
Buy from a lumber supplier who stores cedar dry and covered, and check the boards for straightness, knots and damage. Once delivered, keep the bundles off the ground, under cover and with air moving around them, and let the boards adjust to the site before you hang them. Wet or freshly kiln-dried boards that are hung in the wrong condition can shrink, cup or gap.
Seal and finish before you hang, if you can
The cedar industry recommends finishing all faces and cutting ends, and we agree. It is far easier to brush stain or sealer on all sides of a board on sawhorses than on a wall, and end grain, which soaks up water fastest, gets sealed before it ever meets rain. Cut ends made on site should be touched up with the same product. Coat end grain at the bottom of vertical siding with a water repellent.
Check the wall
- Sheathing flat, dry and sound.
- Weather-resistive barrier lapped from the bottom up, taped at seams and penetrations.
- Windows and doors flashed sill first, then jambs, then head, with head flashing over trim.
- Framing marked so nails hit solid wood.
- Rain-screen or drainage gap: many installers hang cedar over furring strips to give the wall a ventilated gap behind the boards. Ask your contractor whether that makes sense for your wall.
- Clearances: see the table below.
What sits behind a cedar siding wall
A dry wall behind the boards is what keeps cedar looking good for decades.
- Interior finishDrywall and paint on the room side.
- Framing and insulationStuds at 16 or 24 in. on centre.
- SheathingOSB or plywood, flat, dry and sound.
- Weather barrierLapped, taped and flashed at every opening.
- Furring (optional)Ventilated gap behind the boards.
- Cedar sidingSealed on all faces and ends, nailed into studs.
Simplified wall assembly for illustration. Follow your building plans, the manufacturer’s guidance and the Alberta Building Code for your project.
How to install cedar siding, step by step
The install in eight steps
Order matters more than speed.
- Prep the wallBarrier, tape, window and door flashing.
- Seal boardsFinish faces and cut ends first.
- LayoutStory pole, level line, starter.
- First courseLevel, with a bottom drip edge.
- NailStainless nails, into solid wood.
- Corners and trimMitred or corner boards, sealed.
- CaulkRight sealant, right places.
- FinishStain or paint, then maintain.
Step 1: Wrap the wall and flash every opening
Cedar is durable, but it does not like standing water. Wrap the wall from the bottom up, tape the seams and flash windows and doors. Add horizontal flashing at every window and door header and at material transitions, and leave the siding about 1/4 in. above the flashing ledge. The cedar industry’s advice is not to caulk where the flashing meets the trim, so water can escape.
Step 2: Plan the layout and set the starter
Snap a level line and set the starter strip or a starter board. Use a story pole to work out where each course will land, so you do not end up with a sliver at the top or under a window. On bevel siding, the exposure and the overlap are set by the profile, so follow the supplier’s guide.
!Crew tip
Cedar rewards the person who takes their time on the first course. Check level with a long level and measure up from the bottom every few courses. A wall that is a quarter inch out over 30 ft shows up as tapering lines by the time you reach the eaves.
Step 3: Maintain the clearances
| Location | Clearance | Why |
|---|---|---|
| Bottom of siding to grade | At least 6 in. | Keeps splash, snow and soil moisture away from the boards |
| Siding to roofs or decks | At least 2 in. | Avoids wicking of water into end grain |
| Siding above a flashing ledge | About 1/4 in. | Allows water to drain and dry |
| Flashing and trim junction | Do not caulk | Lets any water escape |
Those numbers come from cedar industry installation guidance and they matter more in snow country than anywhere. Snow that piles against the bottom course melts and refreezes all winter, so a few inches of extra clearance are cheap insurance.
Step 4: Hang the first course
Set the bottom course level, with the bottom edge cut or the starter arranged so that water drips off cleanly. Everything above follows this course, so spend the time here. Work from the bottom up.
Step 5: Nail correctly
- Use stainless steel, hot-dipped galvanized or aluminum nails. Ordinary steel and copper nails react with the natural oils in cedar and cause black stains and rust streaks.
- Use splitless, blunt-point siding nails so boards do not split.
- Penetrate at least 1-1/4 in. through sheathing and other layers into solid wood.
- Do not overdrive nails. Snug the head against the surface without crushing the fibres.
- Follow the profile’s nailing pattern, which is different for bevel, channel and tongue-and-groove boards.
×Watch out
The wrong nails are the single most expensive mistake on a cedar wall. Black streaks run down from every nail head after the first rain, and they are almost impossible to remove. Buy stainless or hot-dipped galvanized nails before you buy the boards.
Step 6: Corners, butt joints and trim
Corners can be mitred (which needs skilled carpentry and good sealing) or finished with corner boards, commonly 3/4 in. or 1-1/4 in. thick. For butt joints, cut the ends at 45 degrees so they shed water, and make sure nails penetrate at least 1-1/4 in. into solid wood. Seal every cut end before it goes on the wall.
Step 7: Caulk with the right sealant
Caulk butt joints, and the joints between the siding and openings or trim, except where flashing meets trim. The cedar industry recommends high-performance acrylic-latex, acrylic, acrylic-silicone, polyurethane, polysulfide or terpolymer rubber caulks, and warns that pure silicone and clear caulks do not work well on Western red cedar.
Step 8: Finish and maintain
Cedar can be stained, painted, oiled or left to weather to silver-grey, but each option changes how often you have to maintain it. Stains show off the grain and need periodic refreshing. Paint gives the most protection when applied to all faces, but hides the wood. Left unfinished, cedar turns grey unevenly, and sun-exposed and rain-sheltered walls age at different speeds, which can look patchy. Choose a finish designed for cedar and follow the label’s temperature and dry-time limits.
▲Bow Valley note
In our high-altitude sun, south and west walls weather fastest, and the soffit-protected top of a wall weathers slower than the exposed bottom. Plan to inspect those elevations first every year, and refresh the finish before the wood is bare, not after.
Cedar siding installation cost
Published Canadian price guides put cedar at the upper end of mainstream siding. A Calgary guide from April 2026 lists cedar at $12 to $20 per sq ft installed, split about $6 to $10 material and $6 to $10 labour. The same guide gives whole-house wood siding ranges, tear-off included: about $10,000 to $18,000 for a bungalow, $15,000 to $28,000 for a 2-storey and $22,000 to $40,000 for a large home.
Cedar cost per sq ft, Calgary 2026
Labour is as large a share as material. Published ranges, not quotes.
Source: Alpine Exteriors Calgary siding pricing guide (April 2026). Ranges vary by contractor and scope. Finishing and maintenance are additional.
Remember that cedar has ongoing costs. Stain or paint, and re-application, add to the lifetime cost, and they are worth budgeting. For side-by-side prices, see siding installation cost by material and Hardie plank siding installation cost.
Cedar and wildfire: what to think about in Canmore
Wood siding is combustible, and in the wildland-urban interface that matters. FireSmart Canada lists fibre cement, stucco, brick and poured concrete among claddings with superior fire resistance, and notes that ember-resistant vents, non-combustible flashing and a clear zone at the base of the wall are just as important as the siding itself. If you love the cedar look but want to reduce risk, common approaches include using cedar as an accent above a non-combustible base, choosing fibre cement with a wood-grain texture on the most exposed elevations, and paying close attention to vents, gutters and the first 1.5 m around the house.
If you are weighing the alternatives, our guides to fibre cement siding installation and installing Hardie board explain the non-combustible route.
Common cedar siding mistakes
- Using ordinary steel or copper nails. They stain and corrode.
- Skipping the end-grain seal. End grain absorbs water fastest and rots first.
- No clearance at grade, roofs and decks. Snow and splash wick into the boards.
- Pure silicone or clear caulk. They do not bond well to cedar.
- Caulking flashing joints. Water needs a way out.
- Hanging boards that are too wet or too dry. Let them acclimate.
- Overdriving nails. Crushed fibres hold water.
- Neglecting the finish. A finish that fails from lack of maintenance means bare wood in the sun.
DIY or hire a cedar siding installer?
Cedar is more forgiving than fibre cement in weight and dust, but it is less forgiving in detail. Every cut end, every joint and every nail has a moisture consequence. A capable DIYer can hang a small wall or an accent gable. For a whole house, a crew that does it every week will finish faster and, more importantly, will get the flashing, clearances and sealing right the first time. If you decide to hire, ask how they seal ends, what nails they use and how they finish, and read how to choose a siding installation company for the wider checklist.
DIY pros
- Save labour on a small wall or accent
- Lighter and easier to cut than fibre cement
- You control the stain colour and finish quality
DIY cons
- Sealing and finishing every board takes time
- Wrong nails or missed flashing show up years later
- Working at height on tall gables
- Poor detailing shortens the life of the wall
Our siding installation service covers cedar and other materials across Canmore and the Bow Valley, and our window renovation team can schedule window work ahead of the siding so the flashing is done once.
Frequently asked questions
How do you install cedar siding?
Wrap and flash the wall, seal all faces and cut ends of the boards, plan the layout with a story pole, hang the first course level, nail with stainless or hot-dipped galvanized siding nails into solid wood, keep clearances above grade, roofs and decks, caulk with a cedar-friendly sealant and finish with stain or paint.
What nails should I use for cedar siding?
Stainless steel is the best choice, with No. 304 for general siding and No. 316 near the coast. Hot-dipped galvanized and aluminum nails are also acceptable. Avoid ordinary steel and copper nails, which react with cedar and cause stains.
How far off the ground should cedar siding be?
The cedar industry recommends at least 6 in. above grade, and at least 2 in. between siding and roofs or decks, to avoid wicking.
Should cedar siding be stained before or after installation?
Ideally before, on all faces and cut ends, with touch-up on site. It is easier and gives better protection than finishing the boards once they are on the wall.
What caulk should I use on cedar siding?
High-performance acrylic-latex, acrylic, acrylic-silicone, polyurethane or similar. Pure silicone and clear caulks are not recommended for Western red cedar. Do not caulk where flashing meets trim.
How much does cedar siding installation cost?
A Calgary guide from April 2026 lists cedar at about $12 to $20 per sq ft installed. Whole-house wood siding runs about $10,000 to $18,000 for a bungalow and $15,000 to $28,000 for a 2-storey, tear-off included.
Is cedar siding a good choice in Canmore?
It looks right in the mountains and can perform well with good detailing, sealing and maintenance. It is combustible, so in a wildfire-conscious area consider ember-resistant details and, for the most exposed walls, a non-combustible alternative.
Want cedar done right?
Old Goat Construction installs siding across Canmore and the Bow Valley. Tell us what you have in mind and we will give you an honest recommendation on material, detailing and cost.
